Managing Jenkins Artifacts with the Azure Artifact Manager Plugin
Jenkins stores all generated artifacts on the controller server filesystem. This presents a couple of challenges especially when you try to run Jenkins in the cloud:
-
As the number of artifacts grow, your Jenkins controller will run out of disk space. Eventually, performance can be impacted.
-
Frequent transfer of files between agents and controller may cause load, CPU or network issues which are always hard to diagnose.
Several existing plugins allow you to manage your artifacts externally. To use these plugins, you need to know how they work and perform specific steps in your job’s configuration. And if you are new to Jenkins, you may find it hard to follow existing samples in Jenkins tutorial like Recording tests and artifacts.
So, if you are running Jenkins in Azure, you can consider automatically managing new artifacts on Azure Storage. The new Azure Artifact Management plugin allows you to store artifacts in Azure blob storage and simplify your existing Jenkins jobs that contain Jenkins general artifacts management steps. This approach will give you all the advantages of a cloud storage, with less effort on your part to maintain your Jenkins instance.
Configuration
Azure storage account
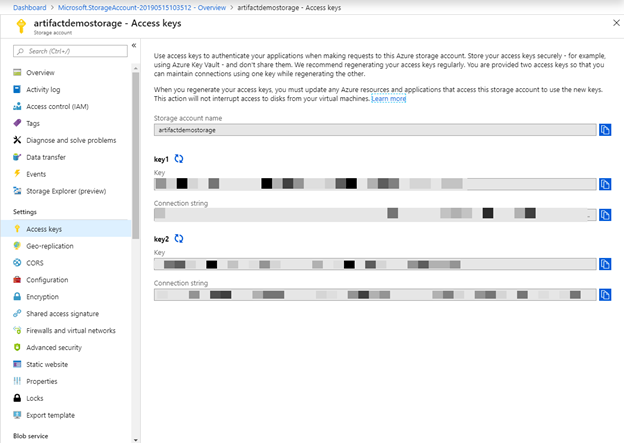
First, you need to have an Azure Storage account. You can skip this section if you already have one. Otherwise, create an Azure storage account for storing your artifacts. Follow this tutorial to quickly create one. Then navigate to Access keys in the Settings section to get the storage account name and one of its keys.
Existing Jenkins instance
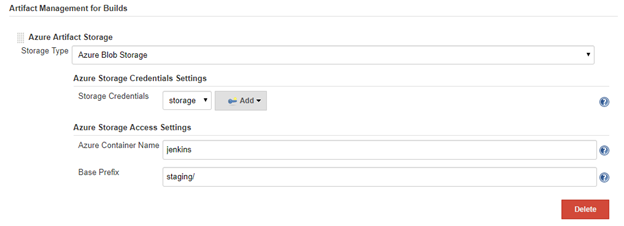
For existing Jenkins instance, make sure you install the Azure Artifact Manager plugin. Then you can go to your Jenkins System Configuration page and locate the Artifact Management for Builds section. Select the Add button to configure an Azure Artifact Storage. Fill in the following parameters:
-
Storage Type: Azure storage supports several storage types like blob, file, queue etc. This plugin currently supports blob storage only.
-
Storage Credentials: Credentials used to authenticate with Azure storage. If you do not have an existing Azure storage credential in you Jenkins credential store, click the Add button and choose Microsoft Azure Storage kind to create one.
-
Azure Container Name: The container under which to keep your artifacts. If the container name does not exist in the blob, this plugin automatically creates one for you when artifacts are uploaded to the blob.
-
Base Prefix: Prefix added to your artifact paths stored in your container, a forward slash will be parsed as a folder. In the following screenshot, all your artifacts will be stored in the “staging” folder in the container “Jenkins”.
New Jenkins instance
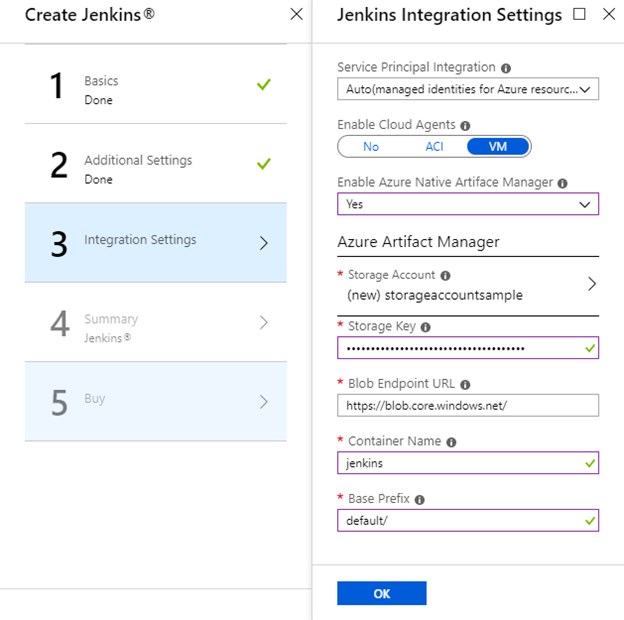
If you need to create a new Jenkins controller, follow this tutorial to quickly create an Jenkins instance on Azure. In the Integration Settings section, you can now set up Azure Artifact Manager directly. Note that you can change any of the configuration after your Jenkins instance is created. Azure storage account and credential, in this case, are still prerequisites.
Usage
Jenkins Pipeline
Here are a few commonly used artifact related steps in pipeline jobs; all are supported to push artifacts to the Azure Storage blob specified.
You can use archiveArtifacts step to archive target artifacts into Azure storage. For more details about archiveArtifacts step, see the Jenkins archiveArtifacts setp documentation.
node {
  //...
  stage('Archive') {
    archiveArtifacts "pattern"
  }
}
You can use the unarchive step to retrieve the artifacts from Azure storage. For more details about unarchive step, please see unarchive step documentation.
node {
  //...
  stage('Unarchive') {
    unarchive mapping: ["pattern": '.']
  }
}
To save a set of files so that you can use them later in the same build (generally on another node or workspace), you can use stash step to store files into Azure storage for later use. Stash step documentation can be found here.
node {
  //...
  stash name: 'name', includes: '*'
}
You can use unstash step to retrieve the files saved with stash step from Azure storage to the local workspace. Unstash documentation can be found here.
node {
  //...
  unstash 'name'
}
FreeStyle Job
For a FreeStyle Jenkins job, you can use Archive the artifacts step in Post-build Actions to upload the target artifacts into Azure storage.
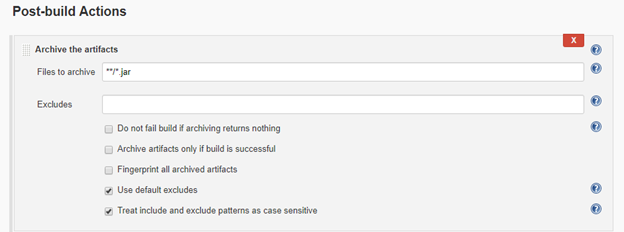
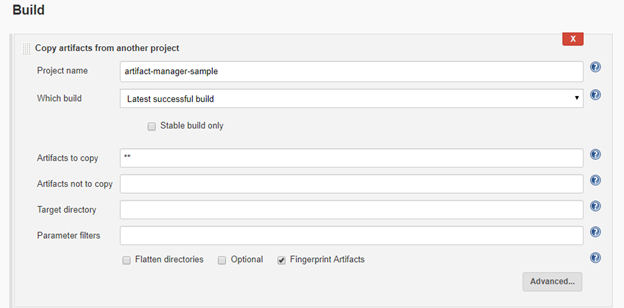
This Azure Artifact Manager plugin is also compatible with some other popular management plugins, such as the Copy Artifact plugin. You can still use these plugins without changing anything.
Troubleshooting
If you have any problems or suggestions when using Azure Artifact Manager plugin, you can file a ticket on Jenkins JIRA for the azure-artifact-manager-plugin component.
Conclusion
The Azure Artifact Manager enables a more cloud-native Jenkins. This is the first step in the Cloud Native project. We have a long way to go to get Jenkins to run on cloud environments as a true “Cloud Native” application. We need help and welcome your participation and contributions to make Jenkins better. Please start contributing and/or give us feedback!